Build Harvester over the Network
View on GitHubBuild Harvester over the Network
- Build Harvester over the Network
- Network Setup Assumptions
- PXE Host OS
- Secure Boot
- VM Resources
- Generate SSH Key (Required for Harvester Access)
- Configure HTTP Server
- Download and Place Boot Artifacts
- [Optional] Install TFTP Server (Fallback for Legacy PXE Clients)
- DHCP Server Configuration (ISC DHCP)
- Create Required Scripts
- Create Configurations
- Build the Machines
- Troubleshooting PXE
Network Setup Assumptions
Section titled “Network Setup Assumptions”| Component | Value |
|---|---|
| HTTP Server IP | 10.10.25.200 |
| Subnet | 10.10.25.0/24 |
| Router/Gateway | 10.10.25.200 (same as HTTP server) |
| DNS | 8.8.8.8 |
| VIP for cluster | 10.10.25.209 |
| ISO Version | v1.4.2 |
| Boot Directory | /usr/share/nginx/html/harvester/ |
PXE Host OS
Section titled “PXE Host OS”[grant@rockydesktop ~]$ cat /etc/*-releaseNAME="Rocky Linux"VERSION="9.5 (Blue Onyx)"ID="rocky"ID_LIKE="rhel centos fedora"VERSION_ID="9.5"PLATFORM_ID="platform:el9"PRETTY_NAME="Rocky Linux 9.5 (Blue Onyx)"ANSI_COLOR="0;32"LOGO="fedora-logo-icon"CPE_NAME="cpe:/o:rocky:rocky:9::baseos"HOME_URL="https://rockylinux.org/"VENDOR_NAME="RESF"VENDOR_URL="https://resf.org/"BUG_REPORT_URL="https://bugs.rockylinux.org/"SUPPORT_END="2032-05-31"ROCKY_SUPPORT_PRODUCT="Rocky-Linux-9"ROCKY_SUPPORT_PRODUCT_VERSION="9.5"REDHAT_SUPPORT_PRODUCT="Rocky Linux"REDHAT_SUPPORT_PRODUCT_VERSION="9.5"Rocky Linux release 9.5 (Blue Onyx)Rocky Linux release 9.5 (Blue Onyx)Rocky Linux release 9.5 (Blue Onyx)Secure Boot
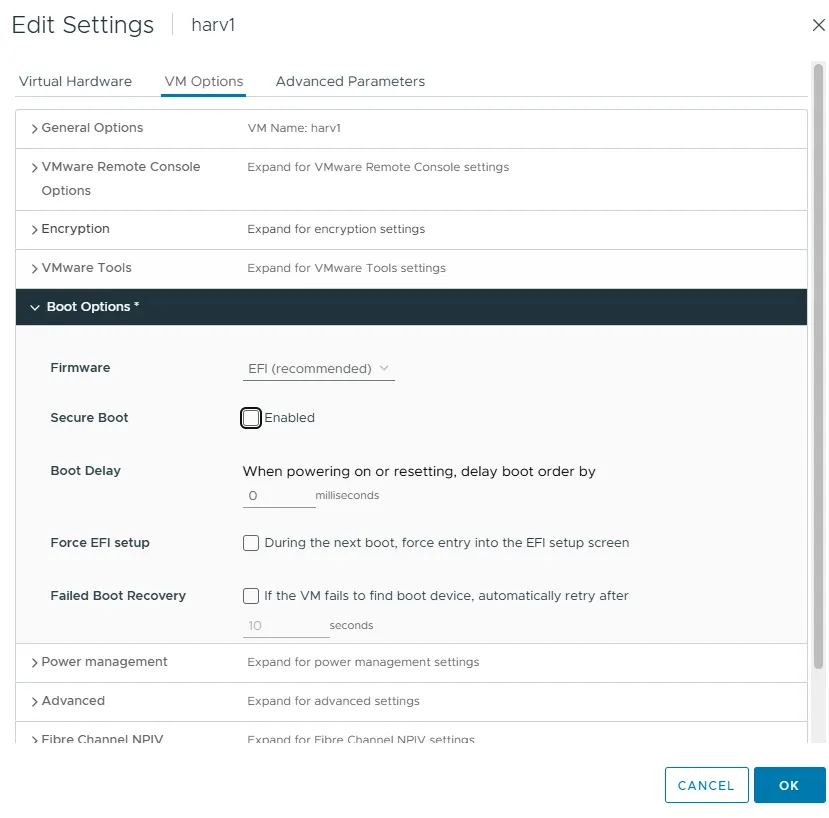
Section titled “Secure Boot”In my setup I was using VMs. Since ipxe.efi isn’t signed so for my experiment I didn’t run secure boot:
VM Resources
Section titled “VM Resources”I tested with VMs. Even with skipchecks: true make sure you put at least 250GiB of space on your hard drive.
Generate SSH Key (Required for Harvester Access)
Section titled “Generate SSH Key (Required for Harvester Access)”Harvester nodes use the rancher user by default and expect a public SSH key for login if you want passwordless, secure access.
If you don’t already have an SSH key, generate one:
ssh-keygen -t rsa -b 4096 -C "your_email@example.com"When prompted, press Enter to accept the default file path (~/.ssh/id_rsa).
Then, copy the public key to use in your Harvester configs:
cat ~/.ssh/id_rsa.pubConfigure HTTP Server
Section titled “Configure HTTP Server”sudo dnf install -y nginxsudo systemctl enable --now nginxsudo chcon -Rt httpd_sys_content_t /usr/share/nginx/html/harvestersudo firewall-cmd --add-service=http --permanentsudo firewall-cmd --reloadDownload and Place Boot Artifacts
Section titled “Download and Place Boot Artifacts”Download the following files from the Harvester Releases page:
From the release you’re using, download:
- The ISO file
- The vmlinuz kernel
- The initrd image
- The rootfs squashfs file
Also download the UEFI iPXE binary:
ipxe.efifrom http://boot.ipxe.org/ipxe.efiwget http://boot.ipxe.org/ipxe.efi
Place them all into your HTTP server directory:
mkdir -p /usr/share/nginx/html/harvester# Copy all downloaded files into this directory[Optional] Install TFTP Server (Fallback for Legacy PXE Clients)
Section titled “[Optional] Install TFTP Server (Fallback for Legacy PXE Clients)”Some systems may not support HTTP boot correctly. For those cases, TFTP can be used to deliver ipxe.efi or undionly.kpxe.
This section sets up a basic TFTP server that shares the same boot files you’re already serving over HTTP.
Install tftp-server
Section titled “Install tftp-server”# Install tftp-server packagesudo dnf install -y tftp-server tftp
# Create the TFTP root directorysudo mkdir -p /var/lib/tftpboot/harvester
# Copy HTTP server files to the TFTP root (symlinks won't work due to chroot)sudo cp /usr/share/nginx/html/harvester/ipxe.efi /var/lib/tftpboot/ipxe.efisudo cp /usr/share/nginx/html/harvester/ipxe-create /var/lib/tftpboot/harvester/ipxe-createsudo cp /usr/share/nginx/html/harvester/ipxe-join /var/lib/tftpboot/harvester/ipxe-join
# Set SELinux context for TFTP accesssudo chcon -Rt tftpdir_t /var/lib/tftpboot
# Start TFTP serversudo systemctl enable --now tftp.socketConfigure TFTP Service
Section titled “Configure TFTP Service”Create a new systemd socket + service override config:
sudo tee /etc/systemd/system/tftp.socket > /dev/null <<EOF[Unit]Description=TFTP socketDocumentation=man:in.tftpdBefore=inetd.service
[Socket]ListenDatagram=69SocketMode=0666
[Install]WantedBy=sockets.targetEOF
sudo tee /etc/systemd/system/tftp.service > /dev/null <<EOF[Unit]Description=TFTP serverRequires=tftp.socketDocumentation=man:in.tftpd
[Service]ExecStart=/usr/sbin/in.tftpd -s /var/lib/tftpbootStandardInput=socketEOF
Enable and Start the TFTP Service
Section titled “Enable and Start the TFTP Service”sudo systemctl daemon-reexecsudo systemctl daemon-reloadsudo systemctl enable --now tftp.socketOpen Firewall Port
Section titled “Open Firewall Port”sudo firewall-cmd --add-service=tftp --permanentsudo firewall-cmd --reloadTest TFTP
Section titled “Test TFTP”tftp 10.10.25.200tftp> get ipxe.efitftp> quitIf it downloads successfully, your TFTP fallback is live.
DHCP Server Configuration (ISC DHCP)
Section titled “DHCP Server Configuration (ISC DHCP)”I am using the following:
| Detail | Value |
|---|---|
| DHCP/HTTP Server IP | 10.10.25.200 |
| Subnet | 10.10.25.0/24 |
| DHCP Range | 10.10.25.200–96 |
| VIP for Harvester cluster | 10.10.25.209 |
| Interface Name | ens5 |
| VM | MAC Address | IP Address | Mode | Hostname |
|---|---|---|---|---|
| harv1 | 00:50:56:8a:ce:66 | 10.10.25.201 | CREATE | harv1 |
| harv2 | 00:50:56:8a:99:71 | 10.10.25.202 | JOIN | harv2 |
| harv3 | 00:50:56:8a:53:e9 | 10.10.25.203 | JOIN | harv3 |
Logic Overview
Section titled “Logic Overview”-
UEFI HTTP client boots → sends DHCP request
- DHCP sees
vendor-class-identifier = "HTTPClient"
- DHCP sees
-
DHCP replies with:
filename "http://10.10.25.200/harvester/ipxe.efi";→ This gives the UEFI client the raw iPXE binary
-
The client loads and executes
ipxe.efi -
Then the iPXE binary sends a second DHCP request
- This time it sends
user-class = "iPXE"
- This time it sends
-
DHCP replies with either:
ipxe-create-efi(for CREATE node)ipxe-join-efi(for JOIN nodes)
Install ISC DHCP Server on Rocky 9
Section titled “Install ISC DHCP Server on Rocky 9”sudo dnf install -y dhcp-serversudo systemctl enable --now dhcpdConfigure /etc/dhcp/dhcpd.conf
Section titled “Configure /etc/dhcp/dhcpd.conf”# Defines the client architecture type (used to detect UEFI vs BIOS)option architecture-type code 93 = unsigned integer 16;
# Define your network subnet and static DHCP poolsubnet 10.10.25.0 netmask 255.255.255.0 { option routers 10.10.25.200; # <--- Set to your DHCP/HTTP/TFTP server option domain-name-servers 8.8.8.8; range 10.10.25.200 10.10.25.206; # <--- Optional fallback range deny unknown-clients; # <--- Only serve defined hosts}
# CREATE NODE: harv1group { if exists user-class and option user-class = "iPXE" { if option architecture-type = 00:07 { filename "http://10.10.25.200/harvester/ipxe-create-efi"; } else { filename "http://10.10.25.200/harvester/ipxe-create"; } } else { if option architecture-type = 00:07 { filename "ipxe.efi"; # UEFI TFTP } else { filename "undionly.kpxe"; # BIOS TFTP } }
host harv1 { hardware ethernet 00:50:56:8a:ce:66; # <--- MAC of CREATE node fixed-address 10.10.25.201; }}
# JOIN NODE: harv2group { if exists user-class and option user-class = "iPXE" { if option architecture-type = 00:07 { filename "http://10.10.25.200/harvester/ipxe-join-harv2-efi"; } else { filename "http://10.10.25.200/harvester/ipxe-join-harv2"; } } else { if option architecture-type = 00:07 { filename "ipxe.efi"; } else { filename "undionly.kpxe"; } }
host harv2 { hardware ethernet 00:50:56:8a:99:71; # <--- MAC of JOIN node harv2 fixed-address 10.10.25.202; }}
# JOIN NODE: harv3group { if exists user-class and option user-class = "iPXE" { if option architecture-type = 00:07 { filename "http://10.10.25.200/harvester/ipxe-join-harv3-efi"; } else { filename "http://10.10.25.200/harvester/ipxe-join-harv3"; } } else { if option architecture-type = 00:07 { filename "ipxe.efi"; } else { filename "undionly.kpxe"; } }
host harv3 { hardware ethernet 00:50:56:8a:53:e9; # <--- MAC of JOIN node harv3 fixed-address 10.10.25.203; }}Step 3: Restart DHCP
Section titled “Step 3: Restart DHCP”sudo systemctl restart dhcpdCheck logs for any issues:
journalctl -u dhcpd -xeCreate Required Scripts
Section titled “Create Required Scripts”HARVESTER_VERSION="v1.4.2" # <--- Update with your Harvester versionHTTP_SERVER="10.10.25.200"
mkdir -p /usr/share/nginx/html/harvester
# --- CREATE NODE ---
cat <<EOF > /usr/share/nginx/html/harvester/ipxe-create#!ipxekernel http://$HTTP_SERVER/harvester/harvester-$HARVESTER_VERSION-vmlinuz-amd64 initrd=harvester-$HARVESTER_VERSION-initrd-amd64 ip=dhcp net.ifnames=1 rd.cos.disable rd.noverifyssl console=tty1 root=live:http://$HTTP_SERVER/harvester/harvester-$HARVESTER_VERSION-rootfs-amd64.squashfs harvester.install.automatic=true harvester.install.config_url=http://$HTTP_SERVER/harvester/config-create.yamlinitrd http://$HTTP_SERVER/harvester/harvester-$HARVESTER_VERSION-initrd-amd64bootEOF
cp /usr/share/nginx/html/harvester/ipxe-create /usr/share/nginx/html/harvester/ipxe-create-efi
# --- JOIN NODE harv2 ---
cat <<EOF > /usr/share/nginx/html/harvester/ipxe-join-harv2#!ipxekernel http://$HTTP_SERVER/harvester/harvester-$HARVESTER_VERSION-vmlinuz-amd64 initrd=harvester-$HARVESTER_VERSION-initrd-amd64 ip=dhcp net.ifnames=1 rd.cos.disable rd.noverifyssl console=tty1 root=live:http://$HTTP_SERVER/harvester/harvester-$HARVESTER_VERSION-rootfs-amd64.squashfs harvester.install.automatic=true harvester.install.config_url=http://$HTTP_SERVER/harvester/config-join-harv2.yamlinitrd http://$HTTP_SERVER/harvester/harvester-$HARVESTER_VERSION-initrd-amd64bootEOF
cp /usr/share/nginx/html/harvester/ipxe-join-harv2 /usr/share/nginx/html/harvester/ipxe-join-harv2-efi
# --- JOIN NODE harv3 ---
cat <<EOF > /usr/share/nginx/html/harvester/ipxe-join-harv3#!ipxekernel http://$HTTP_SERVER/harvester/harvester-$HARVESTER_VERSION-vmlinuz-amd64 initrd=harvester-$HARVESTER_VERSION-initrd-amd64 ip=dhcp net.ifnames=1 rd.cos.disable rd.noverifyssl console=tty1 root=live:http://$HTTP_SERVER/harvester/harvester-$HARVESTER_VERSION-rootfs-amd64.squashfs harvester.install.automatic=true harvester.install.config_url=http://$HTTP_SERVER/harvester/config-join-harv3.yamlinitrd http://$HTTP_SERVER/harvester/harvester-$HARVESTER_VERSION-initrd-amd64bootEOF
cp /usr/share/nginx/html/harvester/ipxe-join-harv3 /usr/share/nginx/html/harvester/ipxe-join-harv3-efiCreate Configurations
Section titled “Create Configurations”Now that your PXE and HTTP services are ready, it’s time to define the configuration files that tell each Harvester node how to install and what role it should play in the cluster.
These YAML files are consumed automatically by Harvester during PXE boot and allow fully unattended installs.
You’ll need two files:
config-create.yaml: for the first node (it creates the cluster)config-join.yaml: for all additional nodes (they join the cluster)
These files are served from your HTTP server and referenced in your iPXE boot scripts.
What to Expect
- Each node will download the YAML config during boot.
- The first node will initialize the Harvester cluster.
- Remaining nodes will automatically join once they boot with their config.
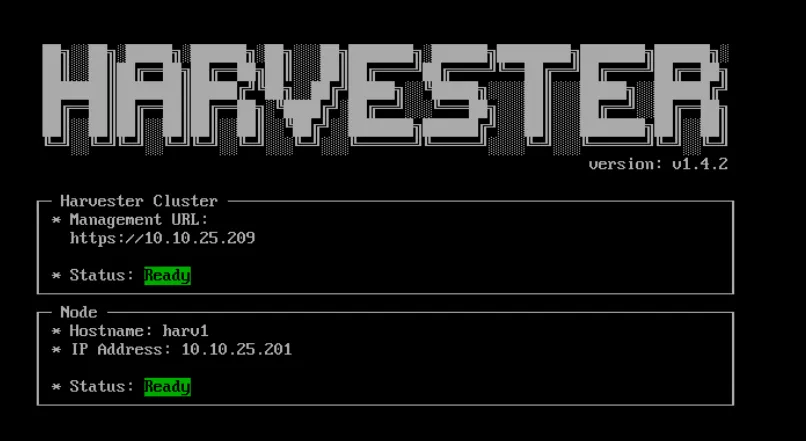
- You’ll be able to access the Harvester UI at the VIP address you specify (e.g.,
https://10.10.25.209).
Make sure to update all placeholder values (SSH key, IPs, version, etc.) where marked. As before the text blocks are setup to be copied and pasted.
Then, power on your VMs and watch your cluster build itself.
Create config-create.yaml (for first node)
Section titled “Create config-create.yaml (for first node)”SSH_KEY=$(cat ~/.ssh/id_rsa.pub 2>/dev/null)if [ -z "$SSH_KEY" ]; then echo "❌ SSH key not found at ~/.ssh/id_rsa.pub" echo "👉 Generate one with: ssh-keygen -t rsa" exit 1fi
cat <<EOF > /usr/share/nginx/html/harvester/config-create.yamlscheme_version: 1token: harvester-cluster-token # <--- Set a consistent token for the entire clusteros: hostname: harv1 password: PASSWORD ssh_authorized_keys: - $SSH_KEY ntp_servers: - 0.suse.pool.ntp.org - 1.suse.pool.ntp.orginstall: mode: create management_interface: interfaces: - hwAddr: "00:50:56:8a:ce:66" # <--- MAC address of harv1 default_route: true method: dhcp bond_options: mode: balance-tlb miimon: 100 device: /dev/sda iso_url: http://10.10.25.200/harvester/harvester-v1.4.2-amd64.iso vip: 10.10.25.209 vip_mode: static skipchecks: trueEOFCreate config-join.yaml (for all JOIN nodes)
Section titled “Create config-join.yaml (for all JOIN nodes)”config-join-harv2.yaml
Section titled “config-join-harv2.yaml”SSH_KEY=$(cat ~/.ssh/id_rsa.pub 2>/dev/null)if [ -z "$SSH_KEY" ]; then echo "❌ SSH key not found at ~/.ssh/id_rsa.pub" echo "👉 Generate one with: ssh-keygen -t rsa" exit 1fi
cat <<EOF > /usr/share/nginx/html/harvester/config-join-harv2.yamlscheme_version: 1token: harvester-cluster-token # <--- Must match the one in config-create.yamlserver_url: https://10.10.25.209:443 # <--- Cluster VIPos: hostname: harv2 # <--- Hostname for this node password: PASSWORD ssh_authorized_keys: - $SSH_KEY dns_nameservers: - 8.8.8.8install: mode: join management_interface: interfaces: - hwAddr: "00:50:56:8a:99:71" # <--- MAC of harv2 default_route: true method: dhcp bond_options: mode: balance-tlb miimon: 100 device: /dev/sda iso_url: http://10.10.25.200/harvester/harvester-v1.4.2-amd64.iso skipchecks: trueEOFconfig-join-harv3.yaml
Section titled “config-join-harv3.yaml”SSH_KEY=$(cat ~/.ssh/id_rsa.pub 2>/dev/null)if [ -z "$SSH_KEY" ]; then echo "❌ SSH key not found at ~/.ssh/id_rsa.pub" echo "👉 Generate one with: ssh-keygen -t rsa" exit 1fi
cat <<EOF > /usr/share/nginx/html/harvester/config-join-harv3.yamlscheme_version: 1token: harvester-cluster-token # <--- Must match the one in config-create.yamlserver_url: https://10.10.25.209:443 # <--- Cluster VIPos: hostname: harv3 # <--- Hostname for this node password: PASSWORD ssh_authorized_keys: - $SSH_KEY dns_nameservers: - 8.8.8.8install: mode: join management_interface: interfaces: - hwAddr: "00:50:56:8a:53:e9" # <--- MAC of harv3 default_route: true method: dhcp bond_options: mode: balance-tlb miimon: 100 device: /dev/sda iso_url: http://10.10.25.200/harvester/harvester-v1.4.2-amd64.iso skipchecks: trueEOFBuild the Machines
Section titled “Build the Machines”At this point you start by booting whichever machine is going to receive the create file, allow it to install, then you boot the others for join and allow them to install.
This should get you three fully built Harvester machines!
Troubleshooting PXE
Section titled “Troubleshooting PXE”Basic Problems
Section titled “Basic Problems”It’s pretty common to have problems trying to get PXE to work so I created this BASH troubleshooting script to check for issues:
#!/bin/bash
NODE_NAME="harv1"NODE_MAC="00:50:56:8a:ce:66"NODE_IP="10.10.25.201"HTTP_SERVER="10.10.25.200"PXE_DIR="/usr/share/nginx/html/harvester"REPORT=$(mktemp)
echo "========== Harvester PXE Troubleshooter =========="echo "📌 Node: $NODE_NAME | MAC: $NODE_MAC | IP: $NODE_IP"echo "📌 HTTP Server: $HTTP_SERVER"echo
# Check DHCP host entryecho "==> Checking DHCP host entry for $NODE_NAME"grep -A5 "host $NODE_NAME" /etc/dhcp/dhcpd.conf > /tmp/dhcp_host_entry.txtif ! grep -q "$NODE_MAC" /tmp/dhcp_host_entry.txt; then  echo "❌ Missing or wrong MAC in DHCP config for $NODE_NAME" >> "$REPORT"fiif ! grep -q "$NODE_IP" /tmp/dhcp_host_entry.txt; then  echo "❌ Missing or wrong IP in DHCP config for $NODE_NAME" >> "$REPORT"fi
# Check DHCP filename logicecho "==> Checking DHCP boot script logic"if ! grep -q "filename.*ipxe-create-efi" /etc/dhcp/dhcpd.conf; then  echo "❌ DHCP config missing filename for ipxe-create-efi" >> "$REPORT"fiif ! grep -q "HTTPClient" /etc/dhcp/dhcpd.conf; then  echo "❌ DHCP config missing HTTPClient detection logic" >> "$REPORT"fiif ! grep -q "user-class.*iPXE" /etc/dhcp/dhcpd.conf; then  echo "❌ DHCP config missing iPXE user-class detection logic" >> "$REPORT"fi
# Check DHCP logsecho "==> Checking recent DHCP logs"journalctl -u dhcpd -n 20 | grep "$NODE_MAC" > /tmp/dhcp_mac_log.txtif [ ! -s /tmp/dhcp_mac_log.txt ]; then  echo "❌ No DHCP logs for MAC $NODE_MAC (maybe not booting correctly?)" >> "$REPORT"fi
# Check iPXE filesecho "==> Checking iPXE script files"for file in ipxe-create ipxe-create-efi ipxe.efi; do  if [ ! -f "$PXE_DIR/$file" ]; then    echo "❌ Missing $file in $PXE_DIR" >> "$REPORT"  fidone
# Check HTTP accessecho "==> Checking HTTP access to ipxe-create-efi"if ! curl -s -I "http://$HTTP_SERVER/harvester/ipxe-create-efi" | grep -q "200 OK"; then  echo "❌ HTTP file not accessible: ipxe-create-efi" >> "$REPORT"fi
# SELinux contextecho "==> Checking SELinux context on $PXE_DIR"if ! ls -Zd "$PXE_DIR" | grep -q "httpd_sys_content_t"; then  echo "❌ Wrong SELinux context on $PXE_DIR — fix with: sudo chcon -Rt httpd_sys_content_t $PXE_DIR" >> "$REPORT"fi
# Show only problemsechoecho "============= ❗ Detected Problems ❗ ============="if [ -s "$REPORT" ]; then  cat "$REPORT"else  echo "✅ No obvious issues found. Boot problem may be firmware-related."fiecho "=================================================="
rm "$REPORT"
Getting Stuck Right After Pulling an IP
Section titled “Getting Stuck Right After Pulling an IP”If your VM is getting stuck right after pulling an IP, my advice is to check to see if the VM is even requesting ipxe.efi with: sudo tail -f /var/log/nginx/access.log