Testing Keycloak
View on GitHubConfigure Keycloak w/AD and OpenShift
Concepts
Section titled “Concepts”Overview
Section titled “Overview”Keycloak: An open-source Identity and Access Management solution. It supports standard protocols like OIDC and SAML for authentication and authorization.
OpenID Connect (OIDC): A simple identity layer on top of the OAuth 2.0 protocol, allowing clients to verify the identity of end-users based on the authentication performed by an Authorization Server.
OpenShift: A Kubernetes distribution by Red Hat that includes a suite of developer and operational tools for containerized applications.
Active Directory (AD): A directory service by Microsoft for Windows domain networks.
Components Involved
Section titled “Components Involved”-
Keycloak Server:
- Acts as the Identity Provider (IdP).
- Connects to Active Directory to authenticate users.
- Issues tokens (ID token, access token) using OIDC protocol.
-
OpenShift Cluster:
- Acts as the Service Provider (SP).
- Uses Keycloak for authenticating users who want to access the OpenShift console.
- Configured to use OIDC with Keycloak as the IdP.
-
Active Directory (AD):
- Acts as the user store.
- Keycloak uses AD to verify user credentials.
Detailed Steps
Section titled “Detailed Steps”Step 1: Set Up Keycloak
Section titled “Step 1: Set Up Keycloak”-
Install and Configure Keycloak:
- Ensure Keycloak is installed and running on your server (
http://10.10.25.199:8080).
- Ensure Keycloak is installed and running on your server (
-
Create a Realm:
- A realm in Keycloak is equivalent to a tenant. It allows you to manage a set of users, credentials, roles, and groups.
- For simplicity, use the
masterrealm or create a new one if needed.
-
Create a Client in Keycloak:
- A client represents an application that will use Keycloak for authentication.
- Client ID:
openshift - Client Protocol:
openid-connect - Access Type:
confidential - Root URL:
https://10.10.25.189(OpenShift URL) - Valid Redirect URIs:
https://10.10.25.189/* - Web Origins:
https://10.10.25.189
-
Set Up Client Credentials:
- Go to the
Credentialstab and note theClient Secret. This secret will be used by OpenShift to authenticate against Keycloak.
- Go to the
-
Configure User Federation (Optional):
- If you need Keycloak to use Active Directory for user authentication, configure the LDAP provider under
User Federation.
- If you need Keycloak to use Active Directory for user authentication, configure the LDAP provider under
Step 2: Set Up OpenShift
Section titled “Step 2: Set Up OpenShift”-
Create a Secret in OpenShift for Keycloak Client Secret:
- Use the OpenShift CLI to store the Keycloak client secret securely.
Terminal window oc create secret generic keycloak-client-secret \--from-literal=clientSecret=<your-keycloak-client-secret> \-n openshift-config -
Configure OpenShift OAuth to Use Keycloak:
- Create an OAuth configuration file (
oauth.yaml) with the following content:
apiVersion: config.openshift.io/v1kind: OAuthmetadata:name: clusterspec:identityProviders:- name: keycloakmappingMethod: claimtype: OpenIDopenID:clientID: openshiftclientSecret:name: keycloak-client-secretissuer: https://10.10.25.199/auth/realms/masterclaims:preferredUsername:- preferred_usernamename:- nameemail:- emailextraScopes: []extraAuthorizeParameters: {}userInfoURL: https://10.10.25.199/auth/realms/master/protocol/openid-connect/userinfo - Create an OAuth configuration file (
-
Apply the OAuth Configuration:
- Use the OpenShift CLI to apply the configuration.
Terminal window oc apply -f oauth.yaml
How It Works Together
Section titled “How It Works Together”-
User Initiates Login:
- When a user attempts to log in to the OpenShift console (
https://10.10.25.189), they are redirected to the Keycloak login page.
- When a user attempts to log in to the OpenShift console (
-
Authentication with Keycloak:
- The user enters their credentials on the Keycloak login page.
- Keycloak authenticates the user against its internal user store or Active Directory if configured.
-
Token Issuance:
- Upon successful authentication, Keycloak issues an ID token and access token to the user.
-
Redirect Back to OpenShift:
- Keycloak redirects the user back to the OpenShift console with the tokens.
-
Token Validation:
- OpenShift validates the tokens with Keycloak.
- If the tokens are valid, the user is granted access to the OpenShift console.
-
Access Granted:
- The user is now logged in and can use OpenShift based on their assigned roles and permissions.
Summary
Section titled “Summary”- Keycloak manages user authentication and issues tokens.
- OpenShift uses Keycloak tokens to authenticate users.
- Active Directory (if configured) serves as the backend user store for Keycloak.
This setup allows centralized authentication using Keycloak, leveraging existing user directories like Active Directory, and providing Single Sign-On (SSO) capabilities for accessing OpenShift.
Feel free to ask if you have any specific questions or need further clarification on any of these steps!
Keycloak Setup
Section titled “Keycloak Setup”Integrate with Active Directory
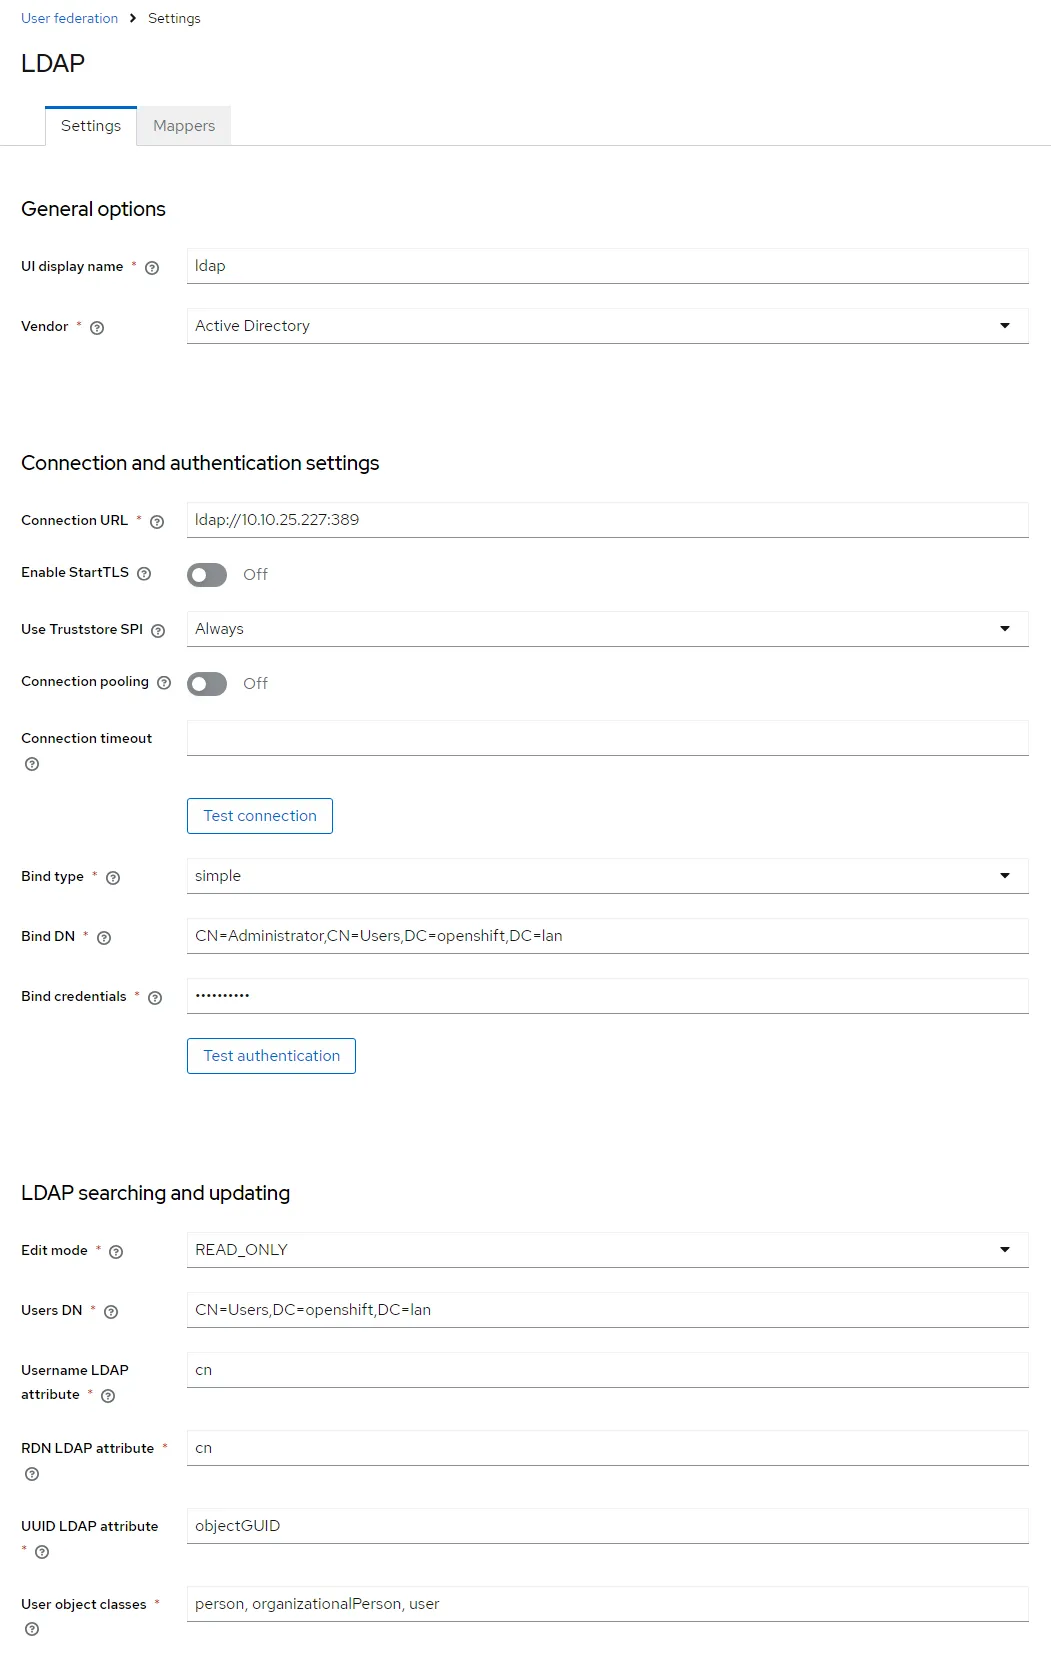
Section titled “Integrate with Active Directory”- I built out active directory apart from this tutorial. Just remember to not add certificate services. You only want active directory then I added a user.
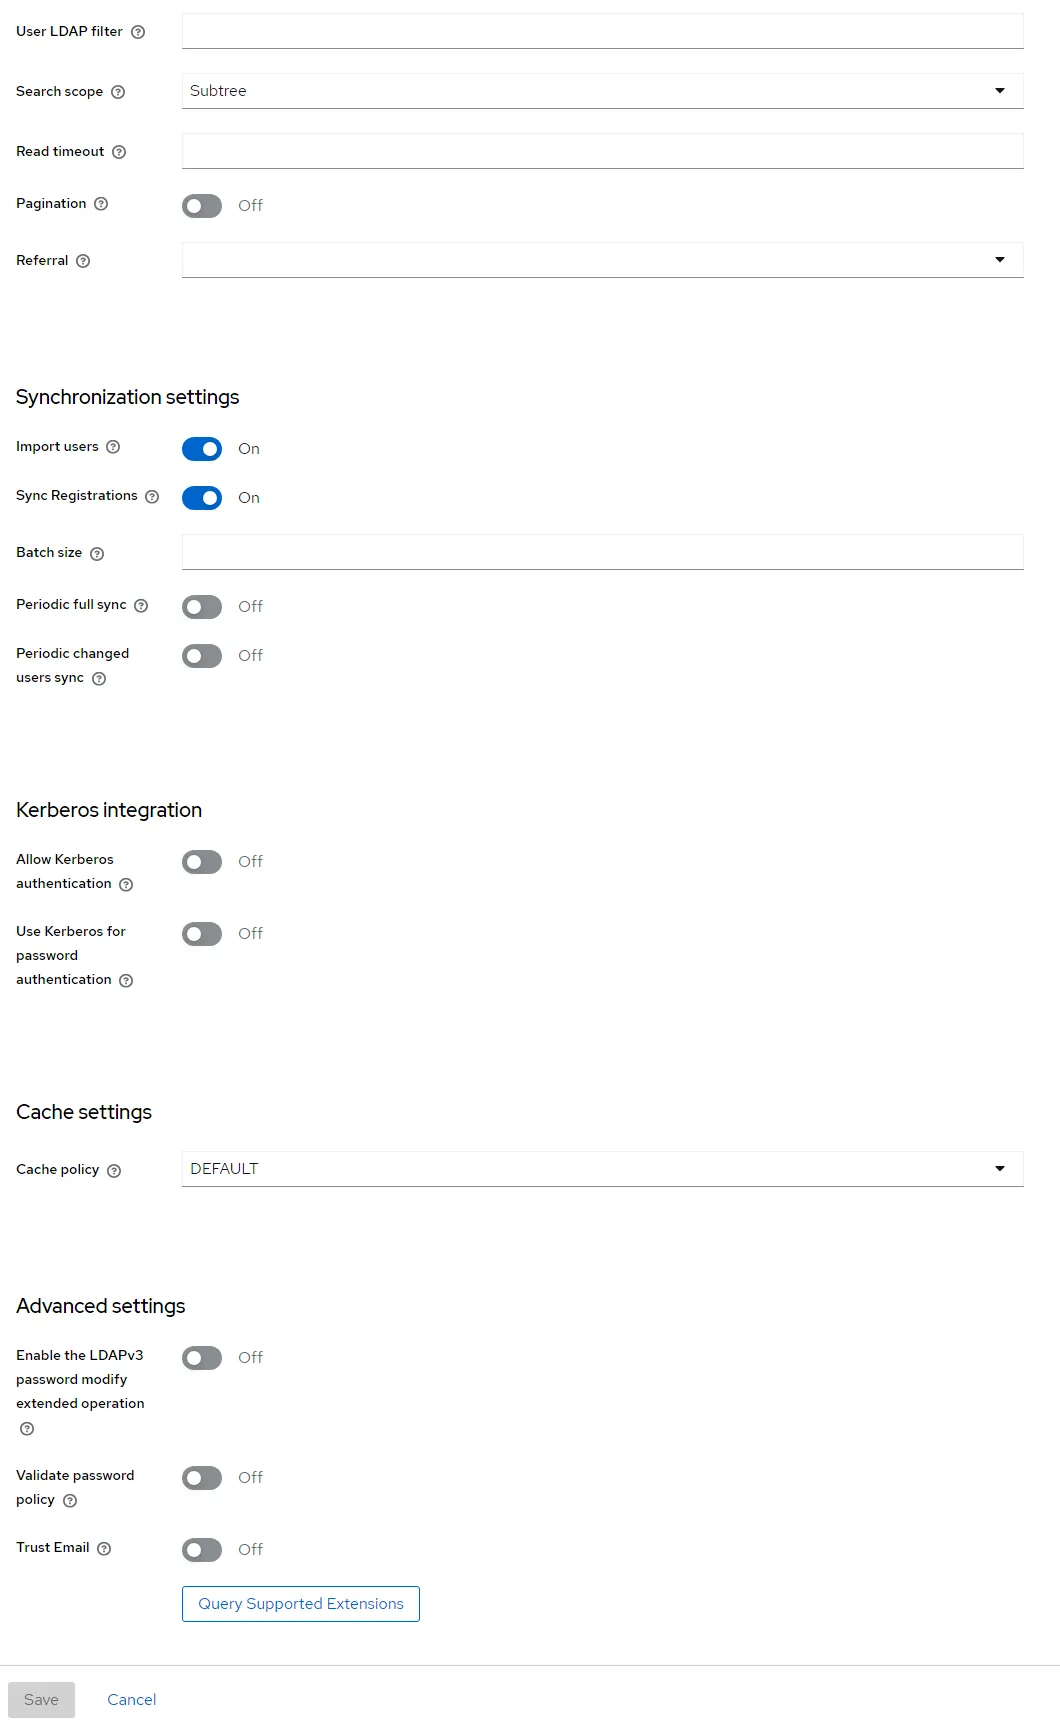
- In Keycloak under user federation, add an LDAP provider with the following:
- Warning, don’t make the mistake I did with AD. If you see
Network response was not okyou probably misconfigured the DN. See this post
- Warning, don’t make the mistake I did with AD. If you see
Configure the Client
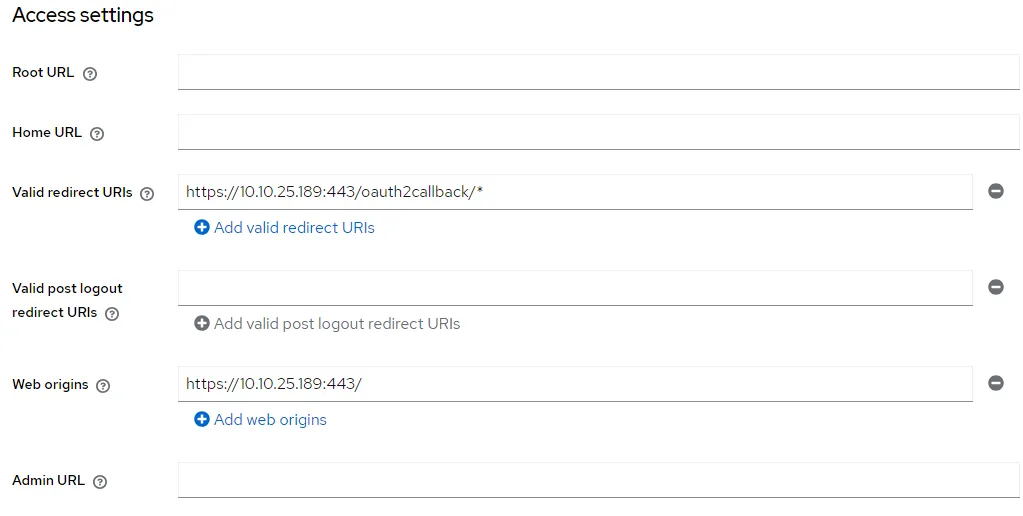
Section titled “Configure the Client”- After you run the test to make sure everything works, you’ll need to set up an OpenShift client
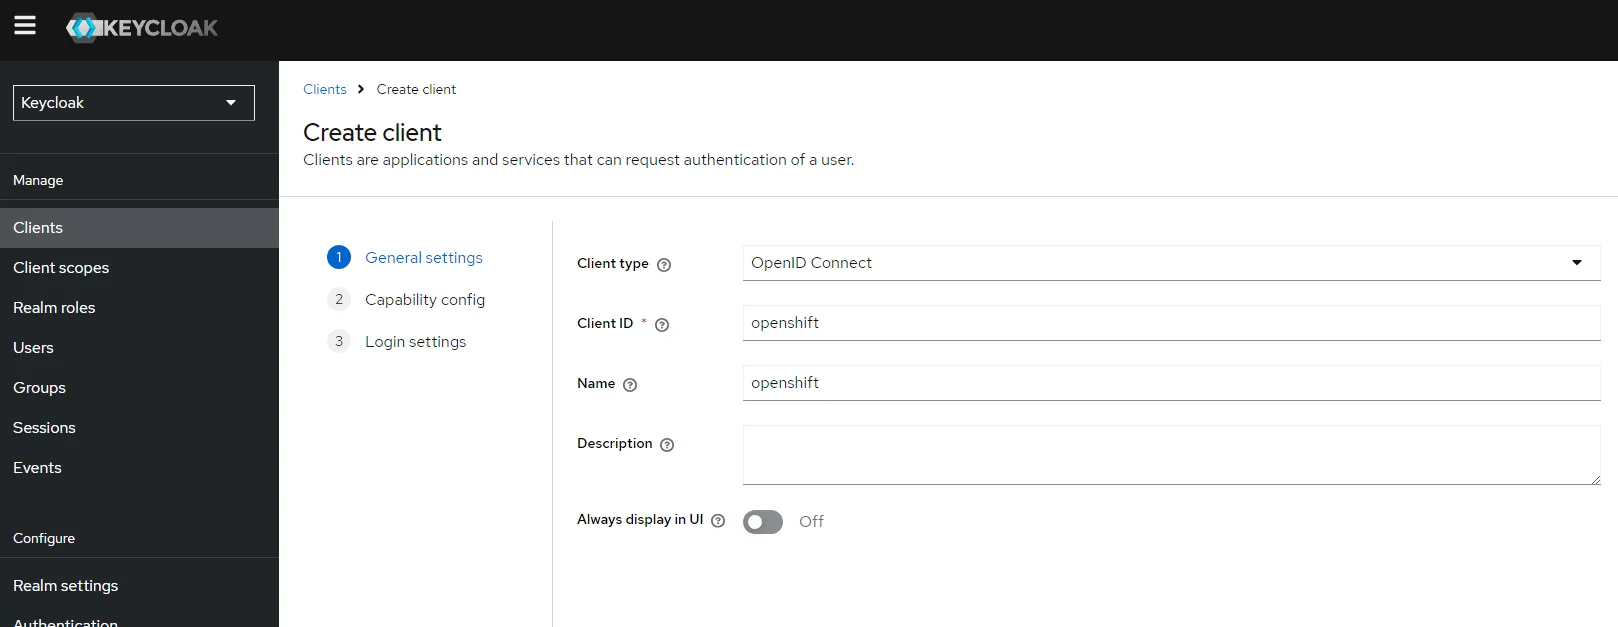
- In capability config make sure you enable
Client authentication. You’ll need that to obtain credentials later for OpenShift.
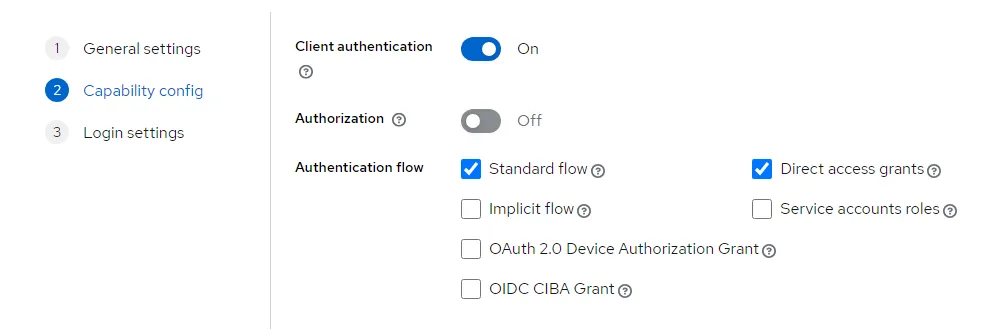
- I used the following access settings:
Configure OpenShift
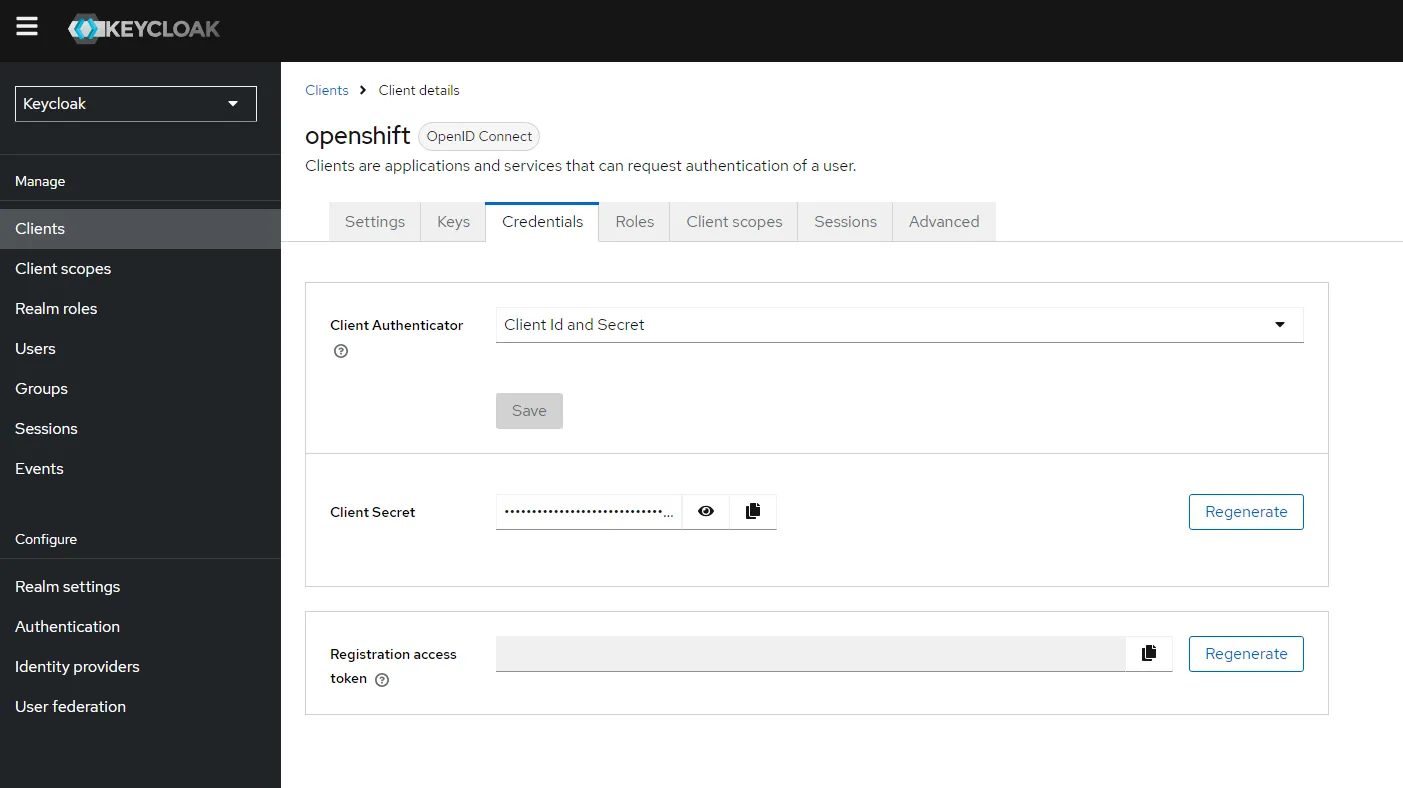
Section titled “Configure OpenShift”- Get your client secret from the OpenShift client you created
- If the credentials tab is missing it is because you didn’t set
Client authenticationto on.
- If the credentials tab is missing it is because you didn’t set
- Configure the secret in OpenShift
oc create secret generic keycloak-client-secret \ --from-literal=clientSecret=j2gcpig9Wd1bfH3nZXon56NYKDhTbV0o \ -n openshift-config- Next create the following file
oauth.yamland then runoc apply -f oauth.yaml
apiVersion: config.openshift.io/v1kind: OAuthmetadata: name: clusterspec: identityProviders: - name: keycloak mappingMethod: claim type: OpenID openID: clientID: openshift clientSecret: name: keycloak-client-secret issuer: https://10.10.25.199/auth/realms/master claims: preferredUsername: - preferred_username name: - name email: - emailHow to Setup Keycloak in Docker
Section titled “How to Setup Keycloak in Docker”Note: I was ultra lazy about permissions for the lab. I ran into a problem where despite 443 being whitelisted in firewalld in all zones, firewalld would block the port anyway. I didn’t spend extra time troubleshooting - I just turned off firewalld.
-
Remove Existing Containers:
Terminal window docker rm -f keycloak postgres -
Create a Docker Network:
Terminal window docker network create keycloak-network -
Ensure Correct Directory Permissions:
Terminal window sudo mkdir -p /opt/postgres /opt/keycloak/data/transaction-logs/ShadowNoFileLockStore/defaultStoresudo chown -R $(whoami):$(whoami) /opt/postgres /opt/keycloaksudo chmod -R 755 /opt/postgres /opt/keycloak -
Run PostgreSQL Container:
Terminal window docker run -d --name postgres \--network keycloak-network \-v /opt/postgres/:/var/lib/postgresql/data \-e POSTGRES_DB=keycloak \-e POSTGRES_USER=keycloak \-e POSTGRES_PASSWORD=password \-p 5432:5432 \postgres:latest -
Run Keycloak Container as Root:
Terminal window docker run -d --name keycloak \--network keycloak-network \--user root \-v /opt/keycloak/data:/opt/keycloak/data \-e KEYCLOAK_ADMIN=admin \-e KEYCLOAK_ADMIN_PASSWORD=admin \-e KC_DB=postgres \-e KC_DB_URL=jdbc:postgresql://postgres:5432/keycloak \-e KC_DB_USERNAME=keycloak \-e KC_DB_PASSWORD=password \-p 8080:8080 \-p 443:8443 \quay.io/keycloak/keycloak:25.0.1 start-dev
After running these commands, you can check the status of the containers to ensure everything is running properly:
docker psdocker logs keycloakAccess Keycloak
Section titled “Access Keycloak”Keycloak should now be accessible at http://localhost:8080. You can log in using the admin credentials you specified (admin/admin).
By ensuring both containers are on the same network, Keycloak will be able to communicate with PostgreSQL correctly.